Your outbound mail queue is backing up. Emails that should land in seconds are sitting there for hours. Then the bounce messages start rolling in, one after another, each one citing a blocklist you have never heard of.
By the time most server admins notice, the abuse has already been running for days. A cron job nobody remembers setting up. A compromised WordPress plugin quietly relays spam through the mail server. A misconfigured relay that anyone on the internet can use.
None of this shows up as an alert on a dashboard. It shows up as delivery failures, angry customers, and a domain that suddenly cannot send a password reset email.
The good news is that checking whether your server IP is being used for spam or abuse takes minutes, not days. The harder part is knowing what the check actually tells you and what it does not.
This guide walks through both.
Why Server IPs Get Used for Spam and Abuse
Attackers rarely build their own spam infrastructure from scratch. It is slower, and it gets burned fast. Using someone else’s server is faster, and the reputation damage lands on you, not them.
A server can end up sending spam or abuse traffic in a few common ways. A vulnerable web application gets exploited, and a webshell is dropped. A mail server is left as an open relay. A set of stolen credentials, often pulled from a stealer log circulating on criminal marketplaces, gives an attacker valid SMTP or SSH access.
Once inside, the attacker does not need root access or anything sophisticated. They just need enough access to queue outbound mail or push traffic through your network. From the outside, it looks like your server is the one misbehaving, because technically it is.
This is why IP reputation scoring exists. Mail providers, firewalls, and security tools do not just look at content. They look at where traffic comes from and whether that source has a history of bad behavior.
The Warning Signs Before a Blacklist Hit
Blacklisting is usually the last stage, not the first. There are earlier signs if you know where to look.
Signals to watch for:
- Bounce backs and NDRs (non-delivery reports) are filling your outbound queue for addresses you never sent to
- A sudden spike in outbound SMTP connections, especially at odd hours
- A jump in failed login attempts on webmail or admin panels, which often precedes a business email compromise attempt rather than following it
- Complaints landing in your postmaster or abuse@ inbox before the IP ever shows up on a public blacklist
- Automated abuse reports from other mail providers referencing your IP directly
Any one of these on its own can be noise. Two or more things happening together is worth investigating immediately.
IP Reputation Score vs Blacklist Status
These two terms get used interchangeably and they should not be. Blacklist status is binary. Your IP is either listed on a specific blocklist or it is not.
IP reputation is broader. It factors in blacklist history, spam complaint rates, proxy or VPN usage, hosting provider reputation, and behavioral signals collected over time. Two IPs can both be off every major blacklist and still have very different reputation scores.
If you want the fuller breakdown of how these two checks differ and when to use each one, DarkScout has covered the distinction in detail in IP lookup vs IP reputation check.
For a server admin, the practical takeaway is this. A clean blacklist check does not always mean a clean reputation. Check both.
How to Check If Your Server IP Is Flagged
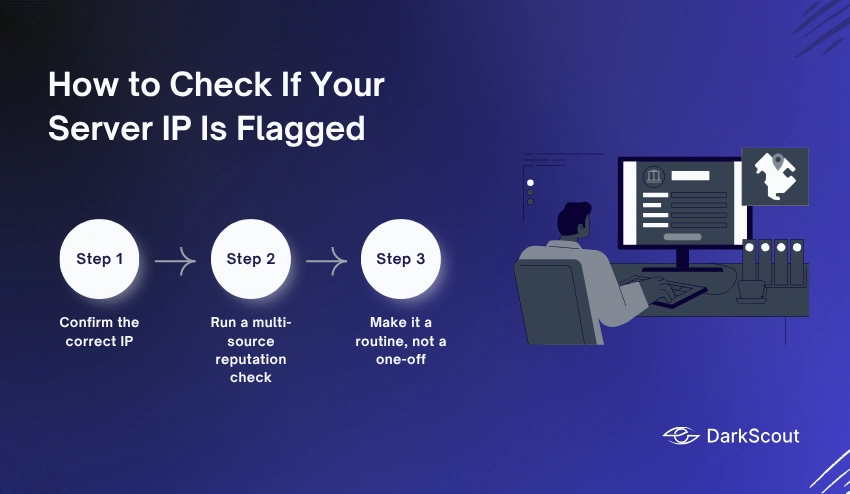
Step 1: Confirm the correct IP
Make sure that you are actually testing your server ip address rather than your PC’s ip address. When testing a mail server, make sure you are testing the mail server ip address and not your PC ip address by doing a reverse DNS lookup or MX record lookup first.
Step 2: Run a multi-source reputation check
Instead of going from blacklist to blacklist to see where your IP address shows up, run your IP address through an IP reputation tool that can do multiple tests in a single run. Our free IP Reputation Checker does this in a single pass, checking your IP for blacklist status, proxy or VPN flags, geolocation mismatches, abuse reports, and an overall risk score.
Step 3: Make it a routine, not a one-off
Running this check regularly, not just when something breaks, is what turns it from a reactive fire drill into an actual monitoring habit. A weekly check takes less time than one afternoon spent troubleshooting bounced email.
Reading the Results Correctly
Not every listing means the same thing. Knowing which type of blocklist flagged you changes how urgently you need to respond.
1. Network-range blocklists
Some blocklists, like UCEPROTECT and SORBS, are known for listing entire network ranges or hosting provider ASNs rather than individual offenders. If you are hit on one of these and clean everywhere else, the problem may belong to your hosting neighborhood, not your server specifically.
2. Evidence-based blocklists
If you are listed on Spamhaus or Abusix, treat it seriously. These operators generally require confirmed abuse evidence before listing an IP, so a hit here usually means something real is happening on your server.
3. Cross-referencing for confirmation
Cross-reference results with AbuseIPDB, which tracks community-reported abuse independent of the traditional DNSBL system. If your IP has recent abuse reports there alongside a blacklist hit, that is strong confirmation you have an active problem, not a false positive.
Finding the Root Cause on Your Server
A reputation check tells you that something is wrong. It does not tell you what. That part happens on the server itself.
1. Check your mail logs
Review Postfix, Exim, or Sendmail logs for a spike in outbound volume, unfamiliar sender addresses, or authentication attempts from IPs you do not recognize.
2. Check active connections and processes
- Run
netstatorssto see active outbound connections - Match each connection to a running process
- A process you do not recognize holding open dozens of SMTP connections is a strong lead
3. Check scheduled tasks
Review cron jobs and scheduled tasks, since attackers frequently plant persistence there rather than relying on a single compromised login.
4. Check the web application layer
If the server runs a CMS or web application, review it for unpatched plugins or unexpected files, since a compromised web app is one of the more common entry points behind cloud misconfiguration related abuse cases DarkScout sees reported.
This investigation phase is where a structured process matters more than instinct. Following a consistent incident response process, even a lightweight one, keeps you from missing a step under pressure.
What to Do If Your IP Is Already Listed
Fix the underlying problem before requesting removal. Blacklist operators will reject delisting requests if the abuse is still active, and some track repeat offenders more harshly on the second request.
The removal process, in order:
- Close the vulnerability or rotate the compromised credentials that caused the abuse
- Confirm outbound traffic has returned to normal volume and pattern
- Submit a delisting request to each blocklist that flagged you, following that operator’s own process
- Provide evidence of remediation if the operator requests it
- Monitor the IP afterward, since some blocklists automatically recheck listed IPs on a schedule
Every operator has its own process. Spamhaus, for example, publishes removal instructions directly on each listing page and does not charge a fee for delisting.
DarkScout has a dedicated walkthrough on this exact process, including what evidence blocklists typically expect and how to remove an IP from a blacklist.
Expect delisting to take anywhere from a few hours to several days, depending on the operator. Staying clean afterward matters more than the removal request itself.
Shared Hosting and Inherited Reputation Problems
If your server sits on shared hosting or a recently reassigned IP, the abuse history may not even be yours. IP addresses get recycled constantly, and a previous tenant’s spam activity can follow the address for months.
1. Inherited IP history
A previous tenant on the same IP may have already triggered a listing before you ever used the address. In this case the reputation problem existed long before your server did.
2. Shared subnet abuse
On shared hosting, other tenants on the same subnet or block can trigger network-range listings that get applied to every IP nearby, including yours, even though your traffic is clean.
Why this changes your response
This is worth checking early, because it changes your response. If the abuse predates your use of the IP, there is nothing to clean up on your end beyond requesting delisting with evidence of the ownership change.
Confirm it with your provider
Ask your hosting provider directly whether the IP has prior abuse history. Reputable providers keep this on record and can confirm it quickly.
Cloud Servers and Rotating IPs
Cloud environments complicate this further. Auto-scaling groups, ephemeral containers, and load balanced instances mean your outward facing IP may change without you noticing.
If reputation checks come back clean but delivery problems persist, confirm which IP is actually being used for outbound traffic. NAT gateways and egress IPs are common blind spots where teams check the wrong address entirely.
For teams running larger cloud footprints, this is also where broader attack surface monitoring becomes useful, since it tracks which IPs and assets are actually exposed rather than relying on a single manual check.
What an IP Reputation Check Cannot Tell You
Being direct about limitations here matters, because this is where a lot of teams get a false sense of security.
What it cannot do:
- Tell you why an IP was flagged. It shows the listing, not the log entry, the compromised account, or the vulnerable script that caused it
- Catch abuse before it happens. Reputation and blacklist data are inherently reactive. Your IP has to actually send bad traffic somewhere, get noticed, and get reported before any check will show a problem
- Rule out false positives caused by shared infrastructure. A clean score can hide a neighbor on the same subnet who is the actual source of abuse, and a flagged score can just as easily belong to someone else entirely
- Replace log review or endpoint monitoring. A reputation check is a signal that something needs investigating, not a diagnosis
There is no reputation score that predicts a compromise the day before it happens.
Preventing the Next Incident
Most repeat incidents come down to the same handful of gaps.
Common gaps:
- Weak or reused SMTP and SSH credentials
- Unpatched web applications and plugins
- No outbound traffic monitoring or rate limiting
- Missing SPF, DKIM, or DMARC records
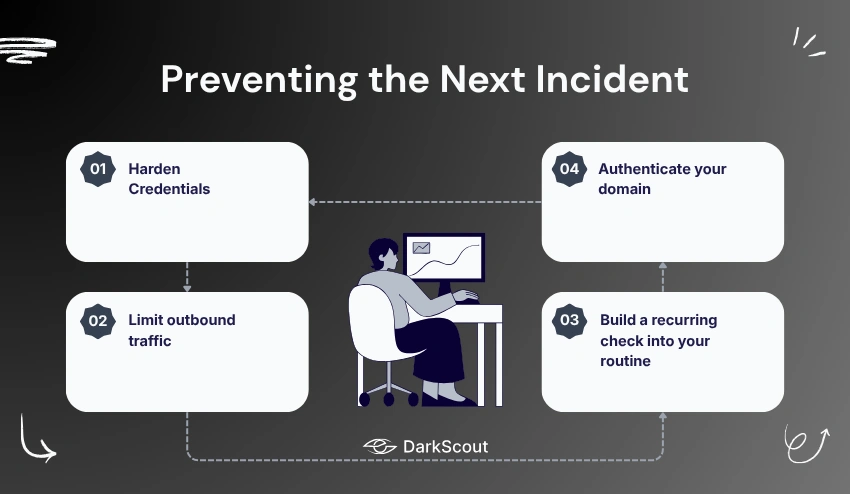
1. Harden credentials
Rotate and strengthen credentials regularly, and check whether any of them have already surfaced in a breach using a tool like DarkScout’s email breach scan.
2. Limit outbound traffic
Set rate limits on outbound SMTP connections so a compromised account cannot silently blast thousands of messages before anyone notices.
3. Authenticate your domain
Publish and verify SPF, DKIM, and DMARC records. These do not stop a server from being compromised, but they make it much harder for anyone to spoof your domain afterward, and mail providers weigh their presence heavily in reputation scoring.
4. Build a recurring check into your routine
Set a recurring reminder, weekly or biweekly, to check your server IP’s reputation rather than waiting for delivery failures to force the issue. It is a five-minute habit that catches most problems long before a customer complains.
Conclusion
Server IPs get flagged for spam and abuse far more often than most admins expect, and the cause is rarely a mystery once you know where to look. Compromised credentials, unpatched applications, and open relays account for the overwhelming majority of cases.
Catching it early depends on two things working together. Regular reputation checks that surface the problem, and log level investigation that confirms the actual cause. Neither one alone gives you the full picture.
The teams that avoid repeat blacklisting are the ones that treat this as routine monitoring rather than emergency response. A quick check before there is a problem beats a scramble to fix bounced email after customers start complaining.
If you manage a mail server, a web application, or any outbound-facing infrastructure, run your IP through DarkScout’s free IP Reputation Checker today and make it part of your regular routine rather than a one-time fire drill.